Sunday, April 30, 2017

Taro Loaf

What can I say, when I meant "tonight" what I really meant was "in two days". In my defense my two children were crazy sick. Anyway, cutting to the chase. A friend of mine, Raelyn, made this AMAZING BREAD for an activity I attended and she graciously gave me that recipe. It was pretty rad, I must say. Our kids downed a loaf while it was still warm. I added a little more sugar than her recipe called for as well as some of the secret ingredients; taro and Okinawan sweet potato. So here's to some purple sweet bread my friends.


Ingredients:
1 1/2 TBSP yeast 
2 C water
2/3 C sugar 
(I mentioned it was sweet right?) 
1 1/2 tsp salt
1/4 C oil 
(using olive oil helps the dough stick together better during the baking process)
2 Okinawan sweet potatoes
2 small taro root
6-6 1/2  C flour 


You'll want to peel and then steam the potato and taro. Cutting them up nice and small will help them steam quicker. You could also boil it if you like. 


After they're moist then place them in a blender (or food processor), adding a little water, then blend. 


It should look like this. The more purple you want the bread, the more Okinawan sweet potato; also known as purple yam. This you should be able to find at your local Asian Market on the mainland. Here in the metro Phoenix area you can find them at LeeLee or MeKong. I made about 1 1/2 - 2 cups worth of paste. It shouldn't be liquid. Notice its consistency. 


Using the 2 C water, add half of the sugar and your yeast and let it rise for 5-15 minutes. 

Once it's risen, dump it into a larger mixing bowl and add in the remaining ingredients; leaving out the flour. Be sure to incorporate the taro/potato mixture before the flour. I mixed this batch by hand because my mixer broke. Nice. 

Mix in the flour one cup at a time. You'll want the dough to be a little sticky. After kneading it for about 10 minutes, place it in a greased bowl, cover it in a damp towel, and let it rise for an hour or into doubled in size. 

Once doubled, punch the dough down and separate into two parts. Using your hands, press one of the parts down into the counter. Using your fingers try your best to spread it into a rectangle about the length of your bread pan.  

Roll the dough like a hand towel. Punch the edges to seal the roll. Place in a greased bread pan. Cover and let rise for another 30-50 minutes. 

Set oven to 350° and bake for 25 minutes. 

As soon as you pull it out of the oven brush the top with a little olive oil (or butter if you're part of Butter Gang). 


Wednesday, April 26, 2017

Steamed Teri- chicken Musubi

Teriyaki Chicken Musubi
I'll spare you the boring back story and get to the grub because you definitely want this
 ⇩⇩⇩⇩


In your mouth ASAP. 

Ingredients
Cooked rice
Nori
Okinawan sweet potato
Boneless, skinless chicken thighs
1 c sugar
1 c shoyu
(Sugar and shoyu/soy sauce is per gallon sized ziploc) 

A steamer, tin foil or waxed paper, and musubi maker are also needed

Make your marinade by mixing equal parts sugar and shoyu. I say about 1 cup of each per gallon sized ziploc. After it is mixed well then place your chicken into a ziploc. Dump your marinade into the ziploc, seal, and marinate overnight out up to two nights. I prefer two nights because it is so much more moist. Just be sure to flip the bag every 6-8 hours so that the marinade has a chance to soak on all parts of the chicken. 

Place your tin foil/wax paper in your steamer and then place chicken in steamer. Steam for about 20 minutes then check to see if they're done. 


Cook your rice. Medium or short grain is the best for "sticky rice".

Cut the nori into strips. Place the nori down on the counter and prop musubi mold on top of it. It should make a lower case '+'. Put your cooked chicken down first. Fill the rest of the musubi mold with cooked rice. Press down with the other half of the mold. Remove the mold and the rice would be cubed. Wet both tips of the nori then bring those tips up, wrapping around the rice. If you don't have a musubi mold then you can use your hands to cup the rice as best you can. 


The sweet potato is not a must but definitely worthy of being steamed then eaten. My favorite part about this plant is that you don't need to season it. You should be able to find it at your local Asian market. 


Enjoy! 

Monday, April 24, 2017

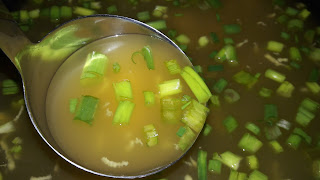
Saimin a la Kreecha

So, when I was younger only two people called me Kreecha. My mom, and my dear friend Mahi. No that's not her real name but our Spanish teacher called her that during summer school and it stuck. That was probably one of the summers I felt like the coolest underclassman in town. Dear sweet Kahi. What a beautiful person inside and out. Gone way too soon as another warrior against cancer. If there was one part of that summer I loved it was the upper class men letting me hang with them during lunch breaks. Oh lunch breaks. Saimin. Mmmm. If you want the best saimin you'll need to check out Shigee's in Wahiawa on O'ahu. But since I'm in the middle of the desert I decided I'd need to come up with something because, quite frankly, I don't trust many Asian restaurants up here in AZ. So this is what I came up with,

Saimin a la Kreecha

Noodles

3/4 C flour
1 egg
Dash of salt
(This is per person)

Broth

Chicken stock, one box (per two people)
Green onions, chopped
Ginger, thinly grated OR cut into 1" x 1/2" bricks
Chicken bouillon, one cube (optional)

Toppings

Char sui (I'll share the recipe later)
Egg
Bean sprouts
Bok choy
Fish cake


 Noodles :
Make a well with the flour and crack the egg into the middle. Sprinkle a dash of salt on the egg. With a fork, slowly and carefully whisk the egg, incorporating the flour a little at a time. Once it gets a little ticket you can use your hand and start to knead it, adding flour when it gets sticky.

Place the dough balls into a bowl and cover with a moist towel. Let sit for at least 30 minutes. 

While your dough is sitting, go ahead and start your broth. Obviously you can add whatever spices you like. I usually just add my spicy mustard and chili pepper paste at the end. 
Place all broth ingredients into a pot and heat to medium high. 

In a separate pot, boil about 7 cups of water. Dump a bit of salt in the water to keep the noodles from sticking to the bottom. 
If you have a noodle maker, go ahead and use that as you normally would. If not, you can use a rolling pin and roll out the dough. Use a sharp knife or pizza cutter to make the dough into strips. 

(Are you loving HeiTiare's fingernail Polish? My little helper) 
We prefer our noodles to be about this thick. 

Drop one serving of noodles at a time into the water. Wait a couple of minutes, stirring occasionally to separate the noodles, then remove from pot. 

Place your noodles in a bowl. 
Add in your broth then whatever extras you want. 

I know I'm not the best saimin maker in the world but this recipe works for us and I don't see it changing anytime soon.


Enjoy! 

Friday, April 14, 2017

Macadamia Nut-Basil Pesto Pizzaaaaaaaaaaaaaaaaaaaaaaaaaaa!

 Well then, this post will be few in words with a lot of pictures. The way you like it and the way I like my books. Jk,jk.

Here's a little recipe I threw together trying my best to mimic the amazing Kahuku Farm's Macadamia Nut-Basil Pesto Pizza. There is no comparing anything I do to what they can do over at Kahuku Farms. An incredible vegetarian place with a menu you can't resist. Next time you're on O'ahu's North Shore, look them up. This recipe looks and sounds a bit whack, but even my husband agrees that it is amazing. 

There are two ways you can prepare the bread: 
1) frying the bread in a drizzle of olive oil on a skillet or pan, or
2) setting your oven to 350 degrees, drizzle olive oil on the pan and on top of the bread and baking it until it is crispy

Ingredients:

For your crust you can use any bread you want. I believe they use panini (is that how you spell it?) but I use ciabatta. Mmmm.

Egg plant
Tomatoes
Parmesan cheese, grated


Pesto:
1 C fresh basil
3 TBSP macadamia nuts
3 TBSP grated Parmesan cheese
3 cloves garlic
4 TBSP olive oil

To make the pesto simply stick all the ingredients in a blender.


Drizzle olive oil over the bread before baking/frying. Today I did the baking method but I think I'll be sticking to the pan frying method from now on.


Slice your eggplant and tomato about 1/4" thick and, using a little olive oil, cook that in your skillet or pan. (if you like your tomatoes to be a little more fresh tasting you can skip frying the tomato)

Spread the pesto over the bread. Lay the cooked eggplant over the bread with the tomato on top. sprinkle more Parmesan cheese over the top and if you've got leftover pesto, throw that sucker on top for more garlicy goodness.  


Enjoy!

Do me a favor and leave a comment telling me your favorite meal or foods and I'll see if I can come up with a recipe...or find one for you. ha.  


Well, Well, Well

So here's the sitch. It's been about, oh, THREE YEARS since I came on this blog thing. Trust me, I've got a whole slew of excuses that I can give you but I won't. I lie, I will. Dad got sick and his cancer had stopped responding to the chemo. The kids and I were able to fly home and spend his last couple of weeks with him and the family. It was a very humbling experience. Very humble. Without going into much more detail, he passed on December 23, 2014. We had a beautiful funeral service for a beautiful man whom I miss every day. We flew home early January and I had knee surgery in Feb. Then there was rehab for the grade 4 arthritis ridden, meniscus missing, old lady status knee. It lasted for a few months. Come January I had re-injured my back and had started seeing a chiropractor. Not long afterwards did I find out we were expecting babe #4. Our beautiful baby came three months ago. Throughout this process the hubster was in his final year at ASU and working evenings. Here we are, August 2016. I've started training my two amazing, scholarship seeking, high school soccer players again. Being on the pitch has been amazing. I feel at home. And I can honestly say that this was the first time that I've actually written down all of that. I guess it's safe to say that it's been a very emotional and life changing type of three years/

But enough of that. Like my favorite character, Jacqueline from Ever After would say, "I'm only here for the food." So my husband has been on this crazy "healthy food" kick. I was cool with it. But then again, I just had half a bagel and it's 10 p.m. Protein. His little health kick inspired me to read a book written by Adelle Davis. As soon as I opened the book she was like, "Hello?" What I took from this book was that one of the most important things we can give our body is protein. I'm not telling you what you should eat. I'm telling you what has been working for us.

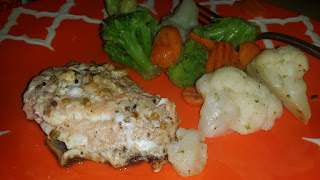
I've decided to start trying to throw stuff together. Yeah, I've been looking up recipes and tweaking them. But I got brave and finally know what spices I like and am a little more comfortable throwing together what I like. So here it is. Salmon. Mmmmm.


I don't know what to call it. Just say Krisha's Salmon. Boom. You're welcome.


The random ingredients:
Coconut oil
Dried chili peppers
Chopped garlic (missing from the pic)
Lime juice
Pepper
Ground paprika
Panchpuran (Indian 5 spice)
Ground Coriander
Ground Cumin


 Like I said, I threw it together as I went so there isn't really any measurements. Explore your inner chef.